
Felt Stitch Sampler
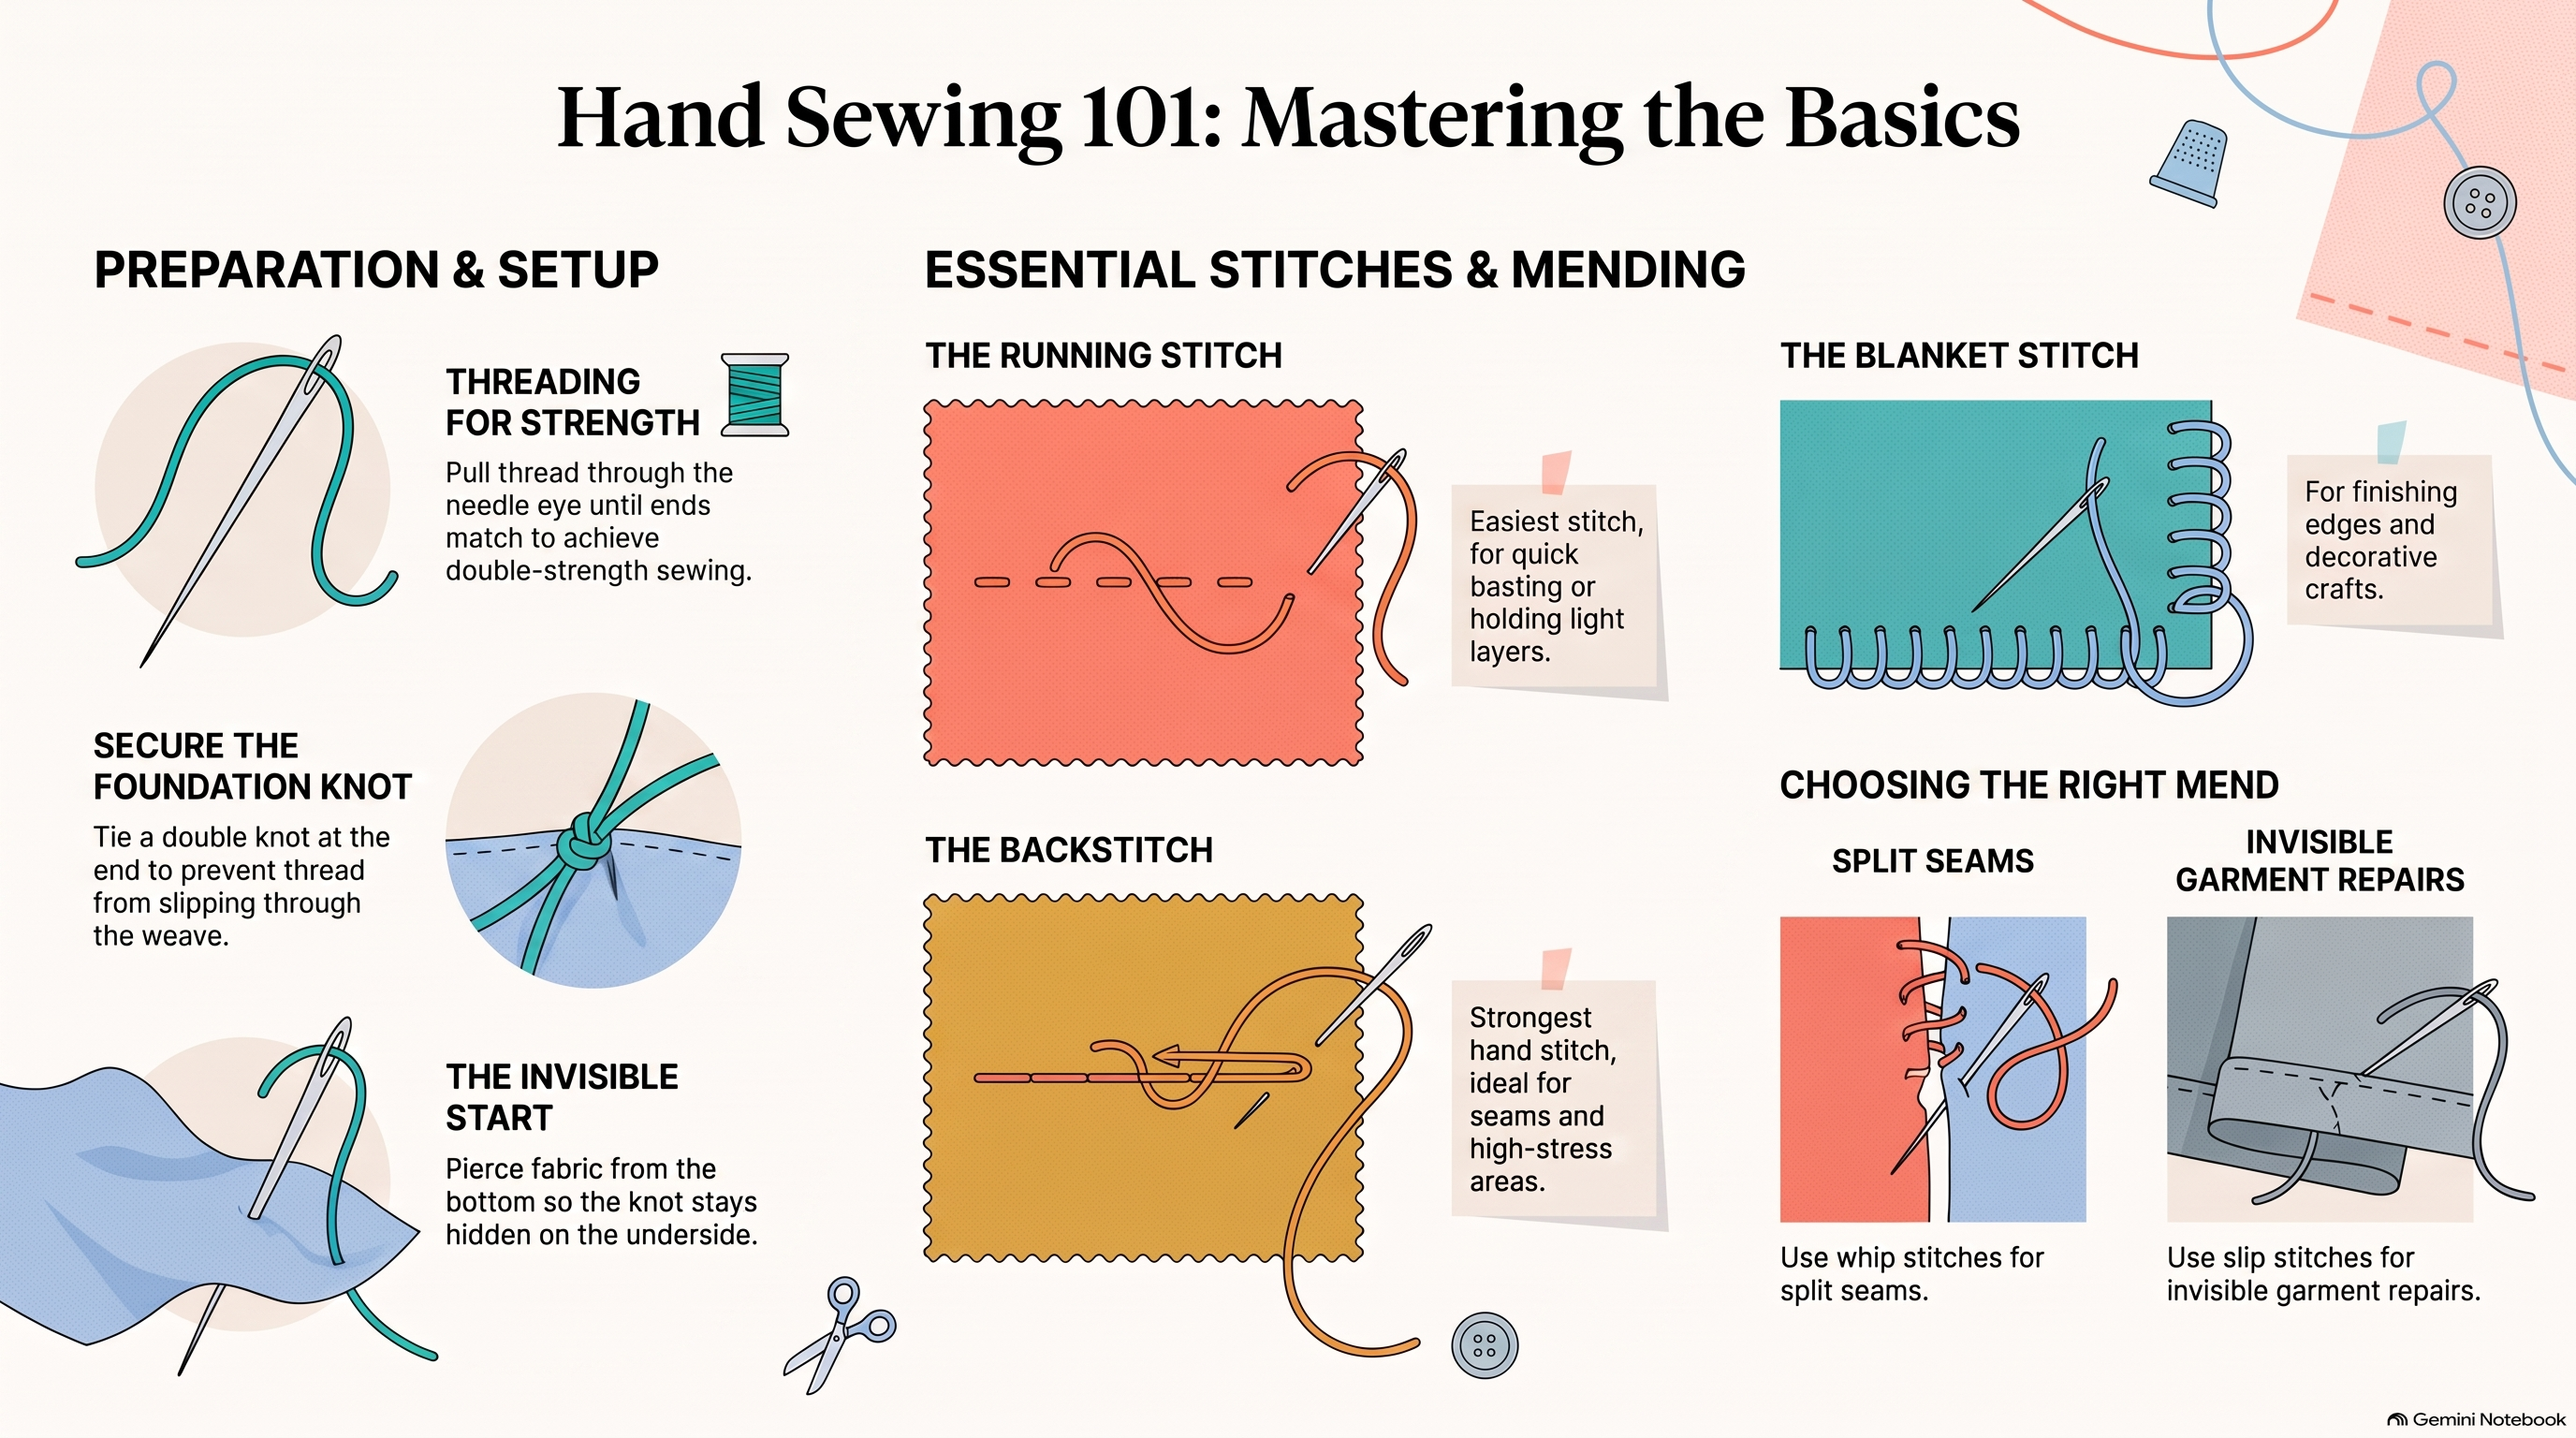
Before you sew anything for real, you need to build muscle memory with the needle. Your stitch sampler is a practice card where you'll demonstrate all 6 required stitches: running stitch, backstitch, whip stitch, blanket stitch, cross stitch, and satin stitch. Each stitch should be neat, even, and labeled. This is your reference card for the rest of the unit — keep it! Here's what each stitch does: the Running Stitch is the easiest — pass the needle in and out in a straight line, great for basting or holding light layers. The Backstitch is the strongest hand stitch — each new stitch begins at the end of the previous one, ideal for seams and high-stress areas. The Blanket Stitch wraps the edge of fabric and is perfect for finishing edges and decorative crafts. The Whip Stitch wraps thread over the edge to join two pieces together. Cross Stitch forms an X pattern for decorative fills. Satin Stitch fills a shape with parallel stitches for a smooth, solid look.
Reference: Hand Sewing 101
Objectives
- 1Complete all 6 stitches on your sampler card: running, backstitch, whip, blanket, cross, and satin
- 2Each stitch section must be at least 2 inches long
- 3Label each stitch with its name
- 4Demonstrate consistent stitch length and tension throughout
- 5Follow all sewing room safety rules before picking up a needle
Materials
- Felt sampler card (provided)
- Embroidery needle
- Embroidery floss in 3+ colors
- Fabric scissors (for thread only — not paper)
- Thimble (recommended)
- Pencil for labeling
- Pin cushion for storing needles when not in use
Tips & Techniques
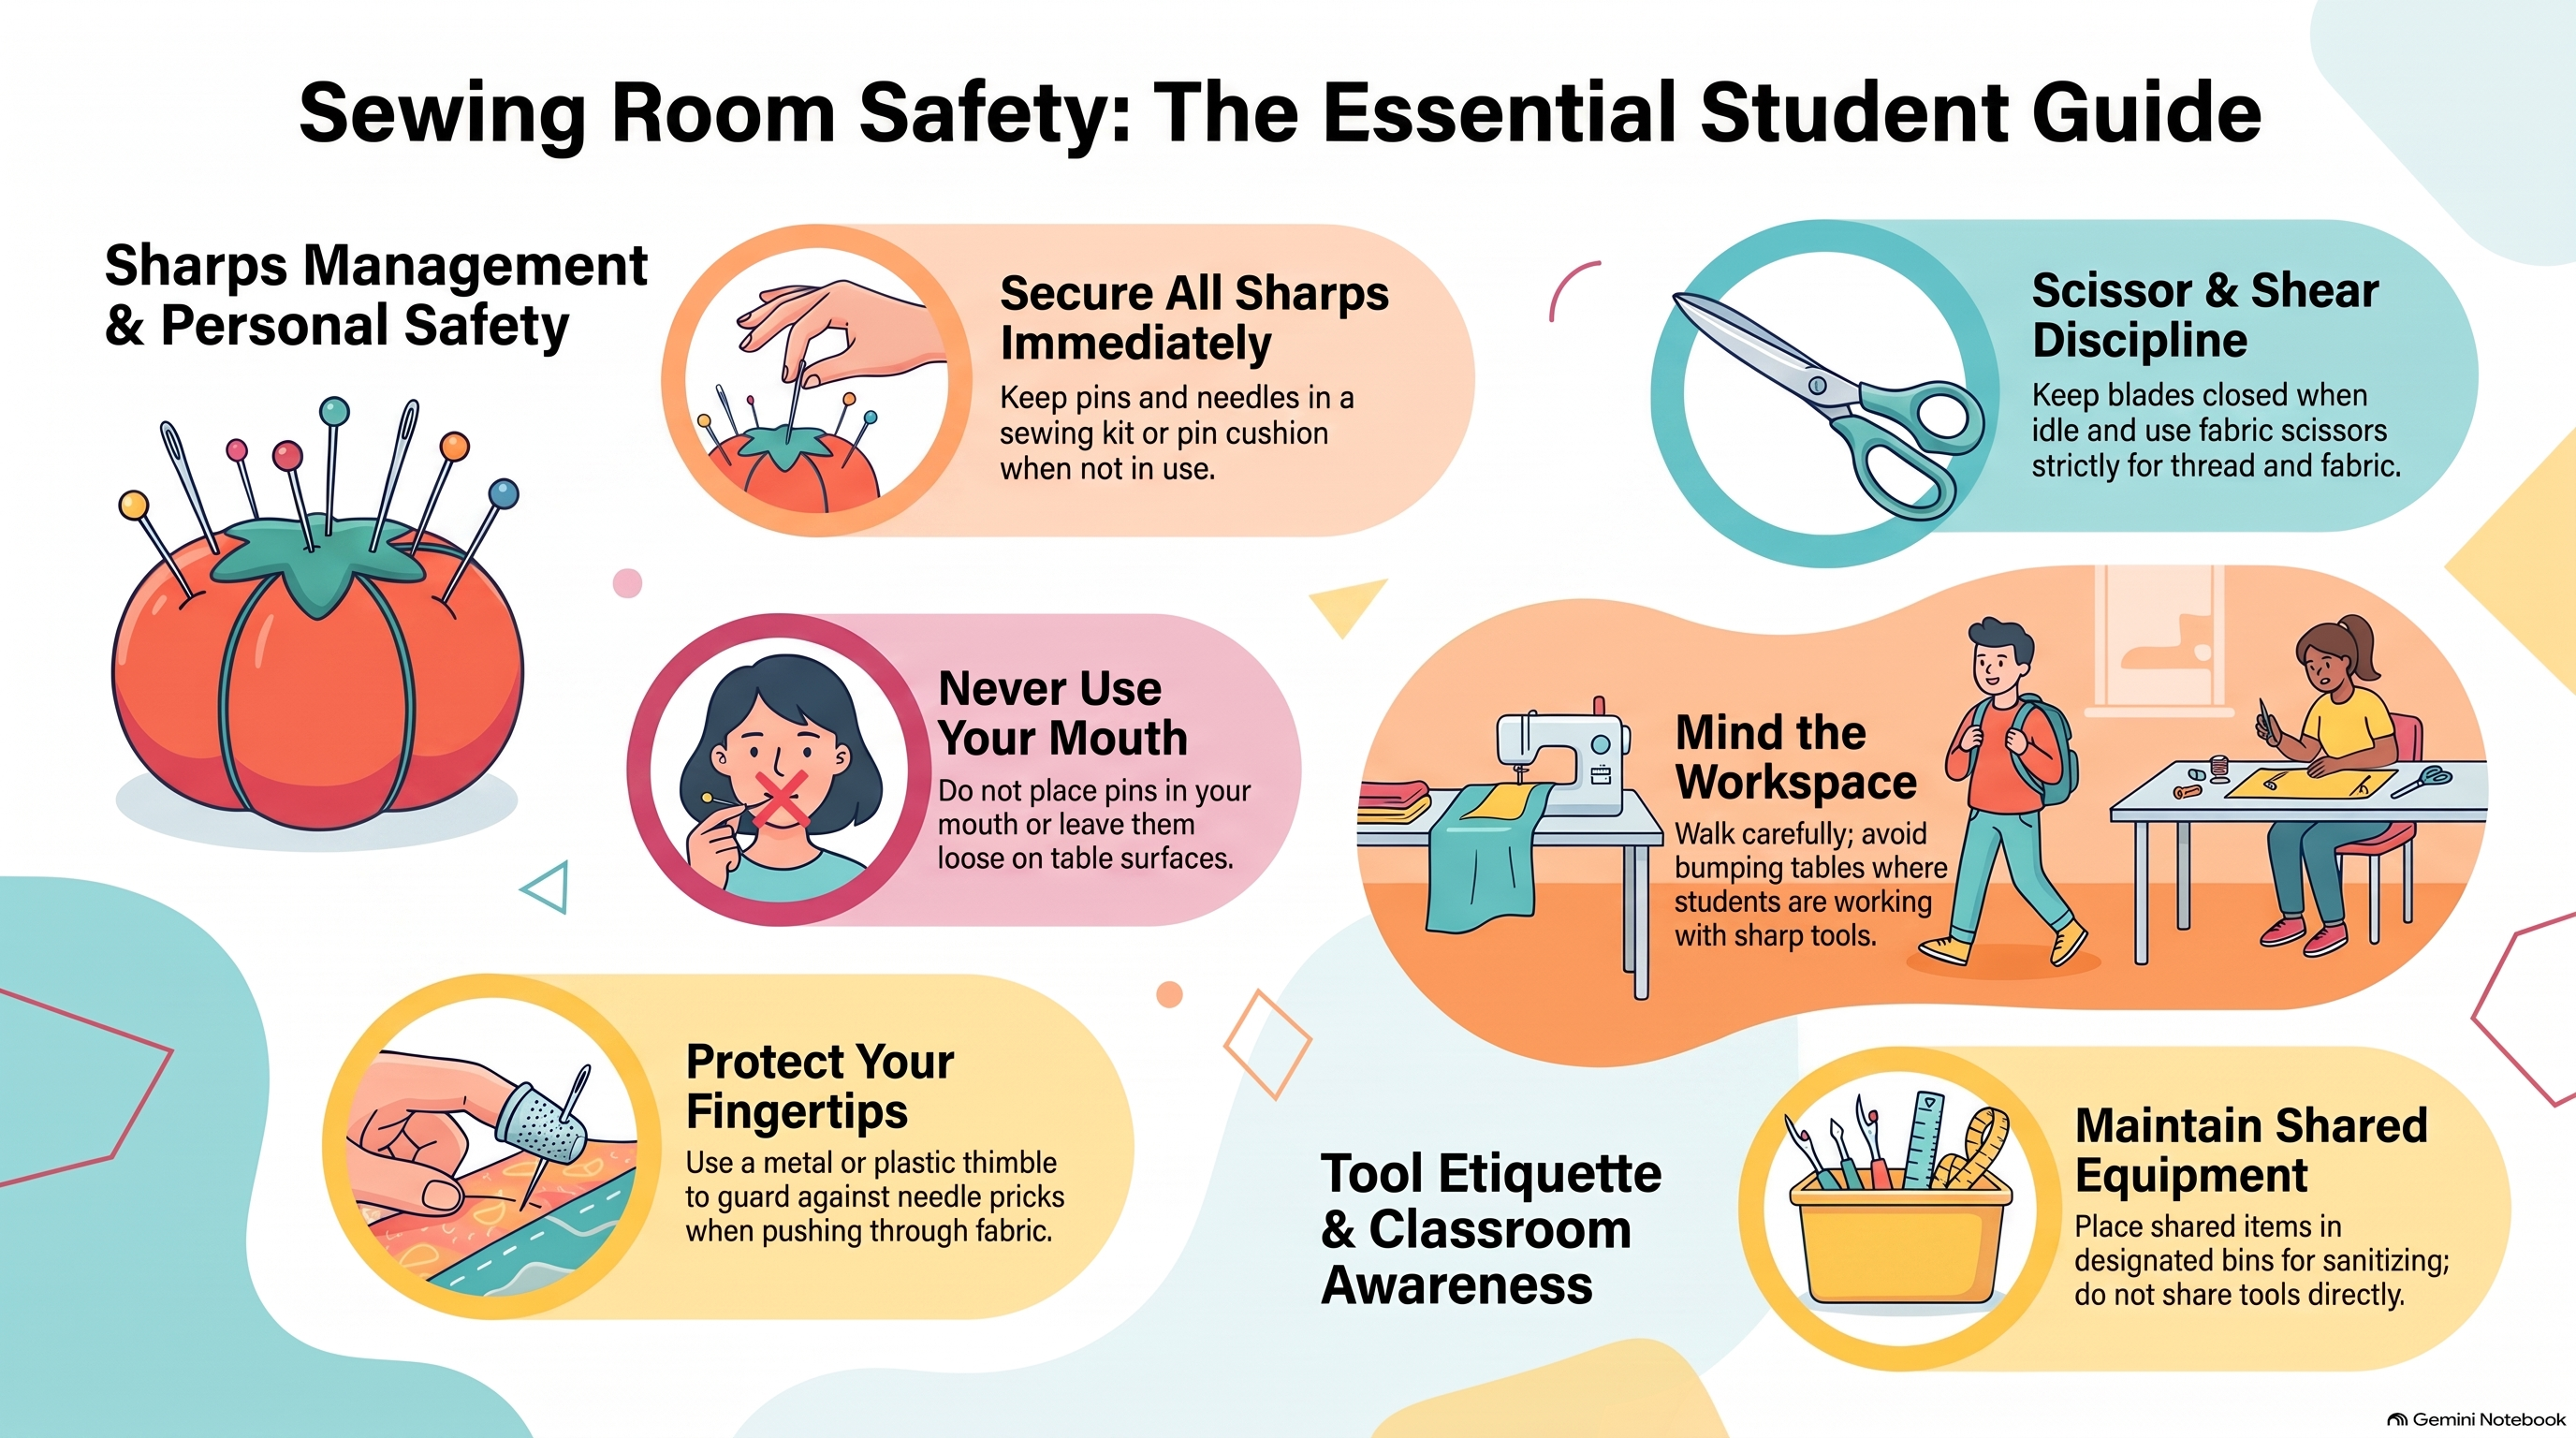
Reference: Sewing Room Safety
Reference: Hand Sewing 101
Lesson Videos
Running Stitch
3 minLearn the running stitch — the most fundamental hand sewing stitch used in appliqué and fabric work.